

Have you ever wished to capture your computer screen with audio but felt uneasy about the technicalities? Don’t worry! You’re not alone. Well, knowing the fundamentals of a screen and sound recorder can save a live performance, help you develop interesting tutorials, or capture gameplay.
We’ll simplify the procedure in our beginner’s guide, taking you through the necessary procedures and resources to get going. Simple guidance to help you effortlessly screen capture with audio on every significant occasion, without any technical terms or bother.
Are you prepared to jump right in? Let’s turn recording into your ultimate strength!
Part 1: What is a Screen and Sound Recorder: Know Everything About It!
Before diving deep into the article, let’s first go through the actual meaning of screen and sound recorder. so, the screen and sound recorder is a multipurpose tool that records both the display and audio output of your computer. You may record both video and audio recordings easily with this powerful mix.
Screen recorders record everything that occurs on your screen, including video conversations, presentations, software lessons, and games. You can improve the viewing experience for viewers by adding background music, system audio, or narration when combined with sound recording.
Screen and sound recorders have a wide range of applications. They are used by businesses for training sessions and webinars, educators to provide engaging classes, and gamers to display their talents. These resources are used by content producers to create engaging and educational videos for their viewers. The first step to easily creating professional-quality recordings is learning how to record screen and audio on Windows 10 or any other device.
So, it was all aboutthescreen and audio recorder. Now, we will move on to the next section, in which we will talk about the importance of screen and audio recording in content creation.
Part 2: The Importance of Screen and Audio Recording in Content Creation!
We all know that screen and audio recording are very important for creating engaging and creative content. there are some reasons why they matter:
Professionalism: It is crucial for content creators. Their content gains a professional touch from well-produced screen and audio recordings. Videos may be more entertaining and audience engagement can be maintained with clear narration and sound effects.

Demonstrations: Screen recording enables creators to walk viewers through every step of a process, which is very helpful for instructional videos and tutorials. It is easier for viewers to grasp complex information when they can follow along visually. Online courses, software demos, and tech reviews are three areas where this visual help does exceptionally well.
interactive experience for users: Screen and audio recording can be combined to create interactive experiences out of basic presentations. This combination, for instance, is very helpful for gaming videos, webinars, and live streaming since it enables in-the-moment participation from the audience and remarks.
Versatility: These recordings can be used for webinars, social media, online courses, YouTube videos, and webinars. This adaptability ensures that you connect with more people.
So, all these points show the importance of screen and audio recording in content creation. well, there are many user guides available out there that show “How to screen record on Windows 10 with audio” if you are one of those who want to know about it.
Part 3: Wondershare DemoCreator: A Perfect Solution for Recording Screen and Audio to Create Engaging Content!
Now, come to the heart of this article, which is a perfect solution to your query, how to Record Screen with Audio on Windows 10. The name of this ultimate tool is Wondershare DemoCreator. DemoCreator makes post-production and editing easier by capturing your screen, webcam, microphone, and system audio on separate tracks. DemoCreator is a flexible platform that caters to a wide range of users, including educators, marketers, gamers, corporate trainers, and more.
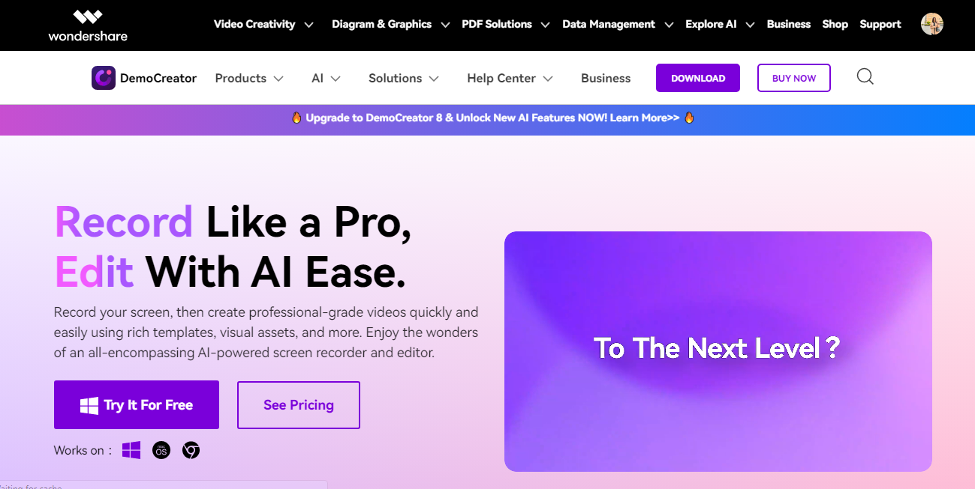
https://democreator.wondershare.com/
let’s check out some amazing features of this tool:
- Capture every detail in 4K or 8K resolution. With DemoCreator’s screen and audio recorder, you can capture natural and high-definition videos at up to 120 frames per second.
- It gives you control over each track. This lets you edit them more and record video, audio, and camera independently.
- With the annotation, spotlight, and cursor enhancement features, you can easily make your content more visually appealing.
- It provides a scheduling option to set up your recordings ahead of time. You can easily stay organized and make the most of every significant capture.
- You may quickly upload your recorded videos to the cloud, share them via secure links, and get cloud-based comments. You can also post your content straight to social networking networks.
These features are convenient. do you agree with me? If yes, then download this amazing tool today.
Now, let’s see how to record screen and sound using Wondershare DemoCreator. below are the steps mentioned:
Step 1: Go to the official DemoCreator website to download the software without any issues.

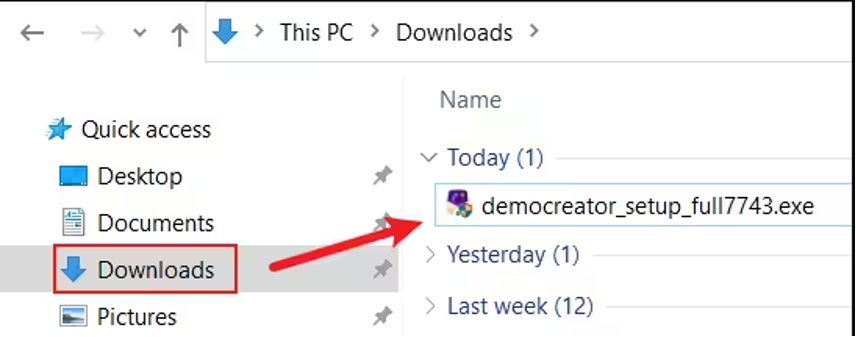
Step 2: To start the installation process, double-click the democreator_setup_full7743.exe file from your Downloads folder. The installation can then be finished by following the on-screen instructions.
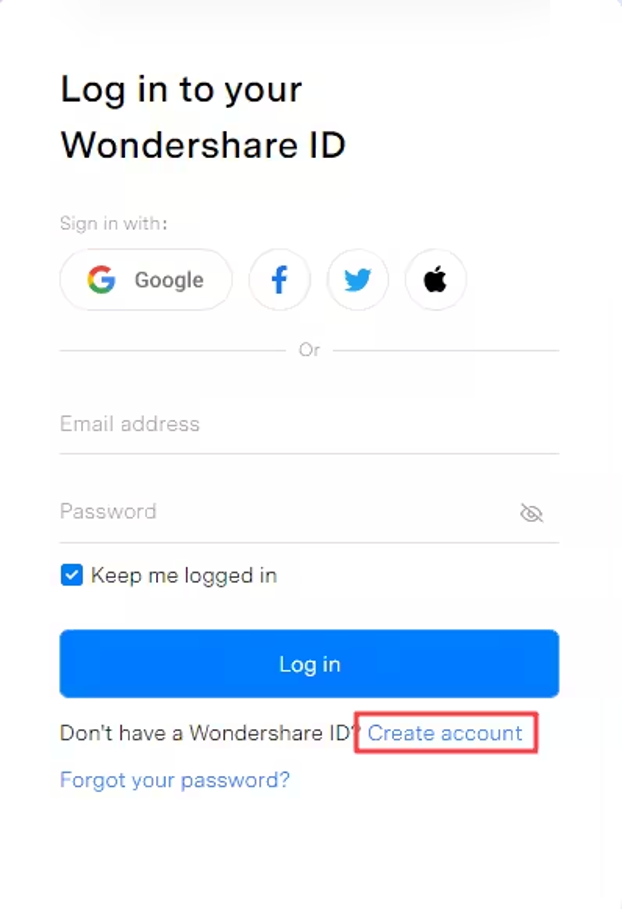
Step 3: Click “Create account” after visiting the Wondershare account center. Enter your email address and select a password to create an account.
Step 4: You can use your screen and audio recorder for free after registering. You should adjust the recording settings. In particular, the screen, audio, camera, and advanced options. You want to record sound and screen activities at the same time.
Click “Screen” to adjust the capture area on your Windows computer. From there, you may change the “Frame Rate” to 120 frames per second. Choose “Game” if you want to record gameplay.
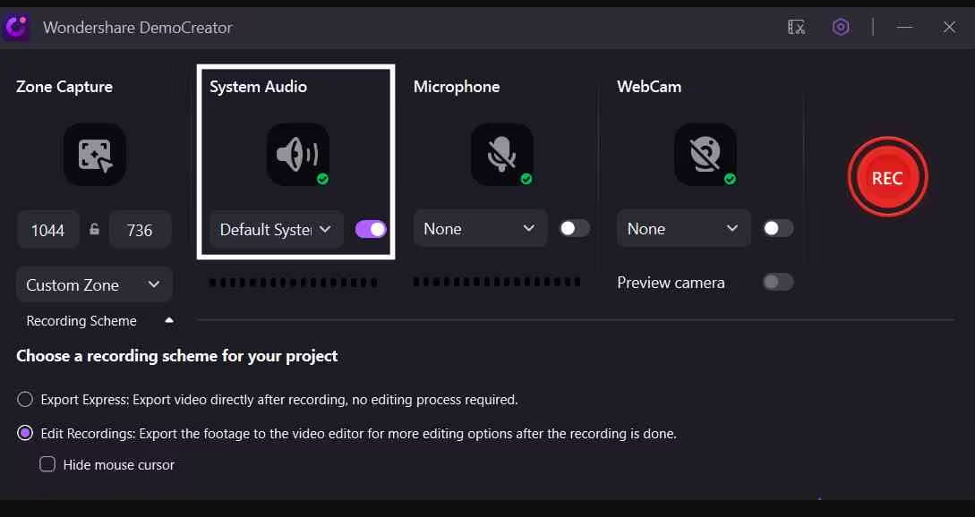
You may find the audio source for your video in the “Audio” section. You have the option to pick both “Computer Audio” and “Microphone.”
If installed, you can also use a webcam to record your clip and use the “Camera” feature to take a picture of your screen. Just select the desired camera, “Frame Rate,” and “Resolution.”
Step 5: Press the “Record” button at the top of the recording console. Do this to begin using your screen recorder for audio and screen recording as soon as it appears. Or, you can use the keyboard’s “F10” button. The countdown will end, and the recording will start.
The keyboard shortcut “F9” allows you to pause and resume recording, and “F10” ends the video.

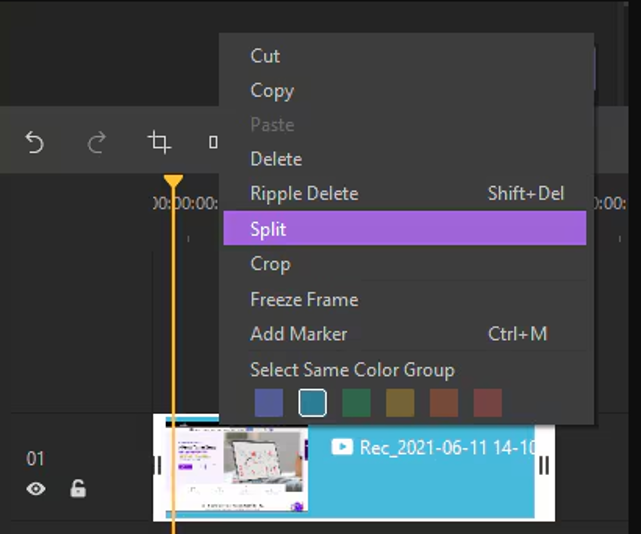
Step 6: DemoCreator’s built-in video editor is one of the reasons it’s the greatest screen recorder for recording screen and sound. For you to edit the recorded clip, it will be loaded into this editor. You can freely break down, resize, rotate, trim, and add annotation or cursor effects to your video.
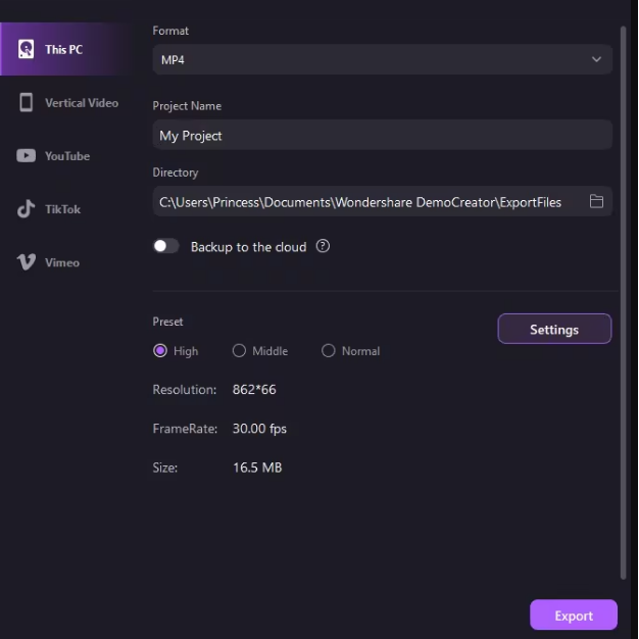
Step 7: You can choose to save your video in the format of your choice or share it straight on social platforms.
You must try these steps to enjoy the features of this ultimate screen and sound recorder tool. now, let’s move on to the next section, in which we will discuss best practices for engaging content creation with a screen and sound recorder.
Part 4: Best Practices for Engaging Content Creation with Screen and Sound Recorder!
As we are done with the screen and sound recorder, now it’s time to know how to create engaging content using the screen and sound recorder. there are some practices that you need to consider. check them out below:
- Keep your content concise and free of unnecessary filler. Information that is clear and brief keeps the audience interested.
- Before recording, make sure your presentation is organized and clear by outlining your primary points and flow.
- Communicate openly and honestly with your audience. To make the topic more engaging, ask questions and promote conversation.
- To direct viewers and highlight key topics, use comments, highlights, and other visual aids.
- Editing after production might improve the finished work. Eliminate unnecessary images, fix errors, and, if necessary, add music or effects.
So, these are some of the best practices that you may consider to make your content more appealing and professional.
Conclusion
We hope this article helped you find the perfect solution forhow to record screen with audio on Windows 10, particularly if you are a Windows user. Moreover, if you want to give a professional look to your videos, you must try the practices that are discussed in this guide. along with that, use Wondershare DemoCreator, which is an all-in-one solution for all of your needs, like screen and audio recording. so, why wait? download this tool today and record your computer screen with audio like a pro!
FAQs
Q1: Which screen and sound recorder tool is best for beginners?
Without a doubt, Wondershare DemoCreator is popular. It is friendly for beginners and for screen and sound recording.
Q2: Can we edit our recordings after capturing them?
Yes, you can edit your recordings after capturing them using the editing interface of the tool you are using.
Q3: What is the best way to prepare for a screen and audio recording session?
To prepare for a screen and audio recording session, you need to plan your script and visuals. must ensure that there is a quiet recording environment.